Friday, August 6, 2010

Announcing a New Blog Adventure!

Over the last three years this blog has gone through many changes. It began as Tutta la Storia, meaning "The Whole Story." But then I lost my Mom and for a while felt like I lost myself, and so I needed a respite, and something new, and so then I started over with Under A Shady Tree. It has always been a blog most about my little family, with some snippets of baking, crafting and antiquing thrown in.

Over the last few months I have really felt a need to give my creative pursuits a new home all their own. I have also recognized that many of those pursuits have a common theme--that of "vintage." To me vintage refers to anything 50 to 100 years old, and antique refers to anything 100+ years old. Retro is less than 50 years old. While my heart adores aspects of each of those areas, it truly lies in the vintage world the most.


So here I am, introducing a new blogging adventure, Vintage Pollyanna! Go take a look. The current post is about how the new blog pays homage to my parents and the shop that they had in Bath, Maine for nearly 20 years. I hope you'll become a regular visitor as I share my vintage adventures in baking, crafting, collecting and design.

Meanwhile, family life will continue as it has here Under the Shady Tree. If you want to see photos of some crazy-cute kiddos, pop over here. If you have a hankering for some vintage treasures, hop over to Vintage Pollyanna. In any case, I hope you'll continue to read.

Best,

Allison

Wednesday, August 4, 2010

Spin Art Day!


James has a good friend named Hayden that he plays with. One day James came home from a playdate with a really neat painting. He told me he had done "Spin Art" at Hayden's house. For his birthday, Hayden gave James a Spin Art set. Today we used it because even though it is nice out, the kids are both running little fevers. This was a fun activity for James while Ella napped.

I love how each painting comes out a bit different. I also love the EASY CLEAN UP!

Thanks Hayden! (And Hayden's mom, Ivy!!)

Monday, August 2, 2010

Where Have I Been?

Wow! Summer is already half-way over and I have been loving my new, "no-commitment" philosophy that I adopted at the start of it. I decided not to enroll the kids in any summer classes, story-times, camps or anything that would be a regular commitment so that we would keep our days loose and wide open. The result has been spur-of-the-moment bike rides, trips to amusement parks, visits to friends' houses and impromptu fun projects of all kinds. Mostly it has meant that we have been so R-E-L-A-X-E-D. Ahhhhh . . . .

It has also meant that I have been enjoying playing with photo editing, both on Picnik and with Adobe Photoshop, and creating effects like these:


We have had some great play dates with my friend Katie and her girl Alexa:


I have enjoyed sewing, sewing and sewing like crazy! This headband was made by Flannery, but I am going to get her to show me how to do it (even if it means I have to kidnap her and chain her to my sewing machine to do it) ha ha ha . . .


Oh yes--and James has been enjoying his new pursuit--that of hermit crab husbandry.


And Ella? She is her crazy self, as usual. I posted on Facebook a few days ago:

"My Ella is a bull in a china shop. She whips food at her brother, laughs like a barmaid at her own farts, pinches her mother and screams like a banshee. But those curls! And that grin! And those cheeks! And that laugh! I ♥ my girl!"


On deck for today? Sewing a ruffle shirt for a friend, some Spin Art, courtesy of James' friend Hayden (a gift for James' birthday). Oh yes--and the invites for Ella' birthday party--which will be a Lemonade and Sunshine Social!!!

Saturday, July 24, 2010

The Ruffle T-Shirt Craze Continues . . .


I am hooked on and have fallen head-over-heels for these ruffled t-shirts! Am I crazy? I definitely have the ruffle bug!

I am also excited to say that I have been given a feedback e-mail on the tutorial I did for the Ruffled Toddler Dress from an Upcycled T-Shirt, AND it included a photo of the reader's finished dress!

Oh, and if you noticed the "Vintage Pollyanna" name on the photo collage, it is a blog I am creating that showcases a love for all things vintage, lovingly named after my Mom's antique store.

Stay tuned,

More later, gotta run and sew!

Thursday, July 22, 2010

Ruffled T-Shirt #2


I went over to my friend Flannery's house last night to sew with her--we decided to try out this tutorial from Tea Rose Home. She chose a white tee and I chose lavender.

Sewing with a friend is so much fun! It was great to work together--she is a more experienced sewer than I am, so I feel like I learned a lot. Her shirt isn't quite done yet, but when it is I will be sure to have her post some photos so that I can share them with you!

This one was a bit harder than the first ruffled t-shirt I did, but I am really happy with how it turned out!


My friend Erica has asked for one of my ruffle tees and I think this one would be great on her!

Wednesday, July 21, 2010

Spirograph--Something Old is New Again


Chris had mentioned to me last year that he wished he still had his old Spirograph kit from when he was a boy. I did some searching on Ebay and found one, with all of the discs and the original pens. He pulled it out a few days ago to show to James and needless to say, the boy loved it!

Monday, July 19, 2010

Ruffled Toddler Dress Tutorial from Upcycled Tee Shirt

Hold your horses folks--I am about to present you with my VERY FIRST sewing tutorial! I have been absolutely crazed with the ruffle shirt tutorials over at Tea Rose Home, (see my recent attempt here) and so I started poking around looking for a toddler dress tutorial which I found at Happy Together. My dress is a combination of both.

For those of you that know me, you know I am NOT great with a sewing machine. I am NOT organized, I am NOT patient, I do NOT use patterns,--basically the way I sew is haphazard, frenzied with excitement and usually with James or Ella (or both) running around. So, my point is that if I can do this, YOU CAN DO THIS!

Start with a tee shirt. I went through my closet this morning and found an old, OLD long-sleeved tee from Old Navy that I used to wear when I was pregnant with James.


I'm not sure why I still have it, as it has a HUGE grease stain on it, but I am sure glad that I hung on to it!


As is instructed by the tutorial over at Happy Together, I found a dress that Ella currently is wearing that I really like the cut of. I folded the tee shirt in half vertically, and then did the same with the dress, which I placed on top of the tee shirt and then cut around it with scissor. See? NO PATTERN!


Then I cut up the side seams on the tee shirt and placed right sides together, pinning them so that I could stitch up the sides (leaving the armholes open) and across the shoulders.


After I finished stitching the two sides together I turned it inside out. Don;t worry about stitching the hem, as you will be covering it with a ruffle. Notice in later photos that when I cut the shape of the dress out, I centered what will be the dress' neckline over the v-neck of the tee. That way there is a more finished look on the dress. Not necessary, but so helpful for someone like me.

Next I cut open the arms of the tee shirt.


I trimmed them with my rotary cutter into a rough rectangle (notice I say "rough" there is blissfully nothing exact about this pattern.) Then I cut two pieces about three inches wide and one piece about 2" wide. I did the same on the other arm.


Now for the ruffle. sew all four of your two-inch pieces together, to form a nice long strip. Next, change your machine settings so that you are using a wide straight stitch. (If this ruffle part makes no sense, I will not be offended if you need to jump over here or over here for a better explanation of how to do it.)

Sew down the middle of your strip. DO NOT BACK STITCH at the beginning and the end.

When you are done, take one end and gently pull the bobbin thread (this is when it is handy to use two different thread colors) or else just try each thread until you find out that when you pull it you make a ruffle.


THIS is the step that is time consuming, almost frustrating, as it can take some time to get the ruffle to look just right.

VOILA! Ruffle!


Next pin the ruffle around the bottom edge of the dress. Tee shirt material can be a little wonky, so make sure that you aren't pulling or stretching either the dress or the ruffle as you go along.


Next, sew RIGHT DOWN THE MIDDLE of the ruffle, all the way around. Some people do this step, but not me, as I said, I am a haphazard, let be what will be, it may all come out in the wash (fingers crossed that it doesn't) kind of seamstress.


Now make a ruffle out of each of the 1 1/2" pieces for each armhole. Pin them around (start and end at the armpit) and sew again.


Ta-DAAAH!!! I was so excited at this point that I was jumping around the room, shoving the dress at Ella and James and yelling "LOOK WHAT MOMMY MADE!!!"


You could be done at this point, but I was going ALL OUT and felt like I was on top of the sewing world, so I got a little crazy and wanted to add an embellishment. I had made one of the flowers in the Tea Rose Home tutorial and it just about did me in, so I went for what I thought might be an easier approach--the rose in the Happy Together tutorial.

I sacrificed an old tee shirt of James' that is too small for him.


From the back I cut a large oval-ish piece and then began to cut a 1/4" (sort of) piece from all the way around it.


Next I pinned it to the shirt and started winding around it loosely.


Next I stitched it in my typical lackadaisical fashion. Not great, but that is why I like the shabby part of shabby chic. (Wink, wink).


I added a vintage purple button to the center of the rose and that was it! (For the life of me I can't get this photo oriented vertically, so just bend your head to the right and you'll see the dress properly.) HA HA.


My Ella in her brandy-new upcycled tee-shirt dress!! (Seriously, I could stitch some paper bags together, throw them on her and she would look great.) Who can even look at what she is wearing when her smile is co crazy-cute??!!


I hope you try my tutorial! And if you make this dress, please leave me a comment and let me know how it turned out!

I am linked up over at Tea Rose Home for Link Party 17! Go see what everyone is posting! Fun stuff!

Oh, and stay tuned . . . I am in the midst of a new blog project combining all of my favorite loves--cooking, baking, homemaking, crafting and collecting--and all with a vintage twist!

XOXO

Allison

Friday, July 16, 2010

Meet A Few of our Feathered Friends

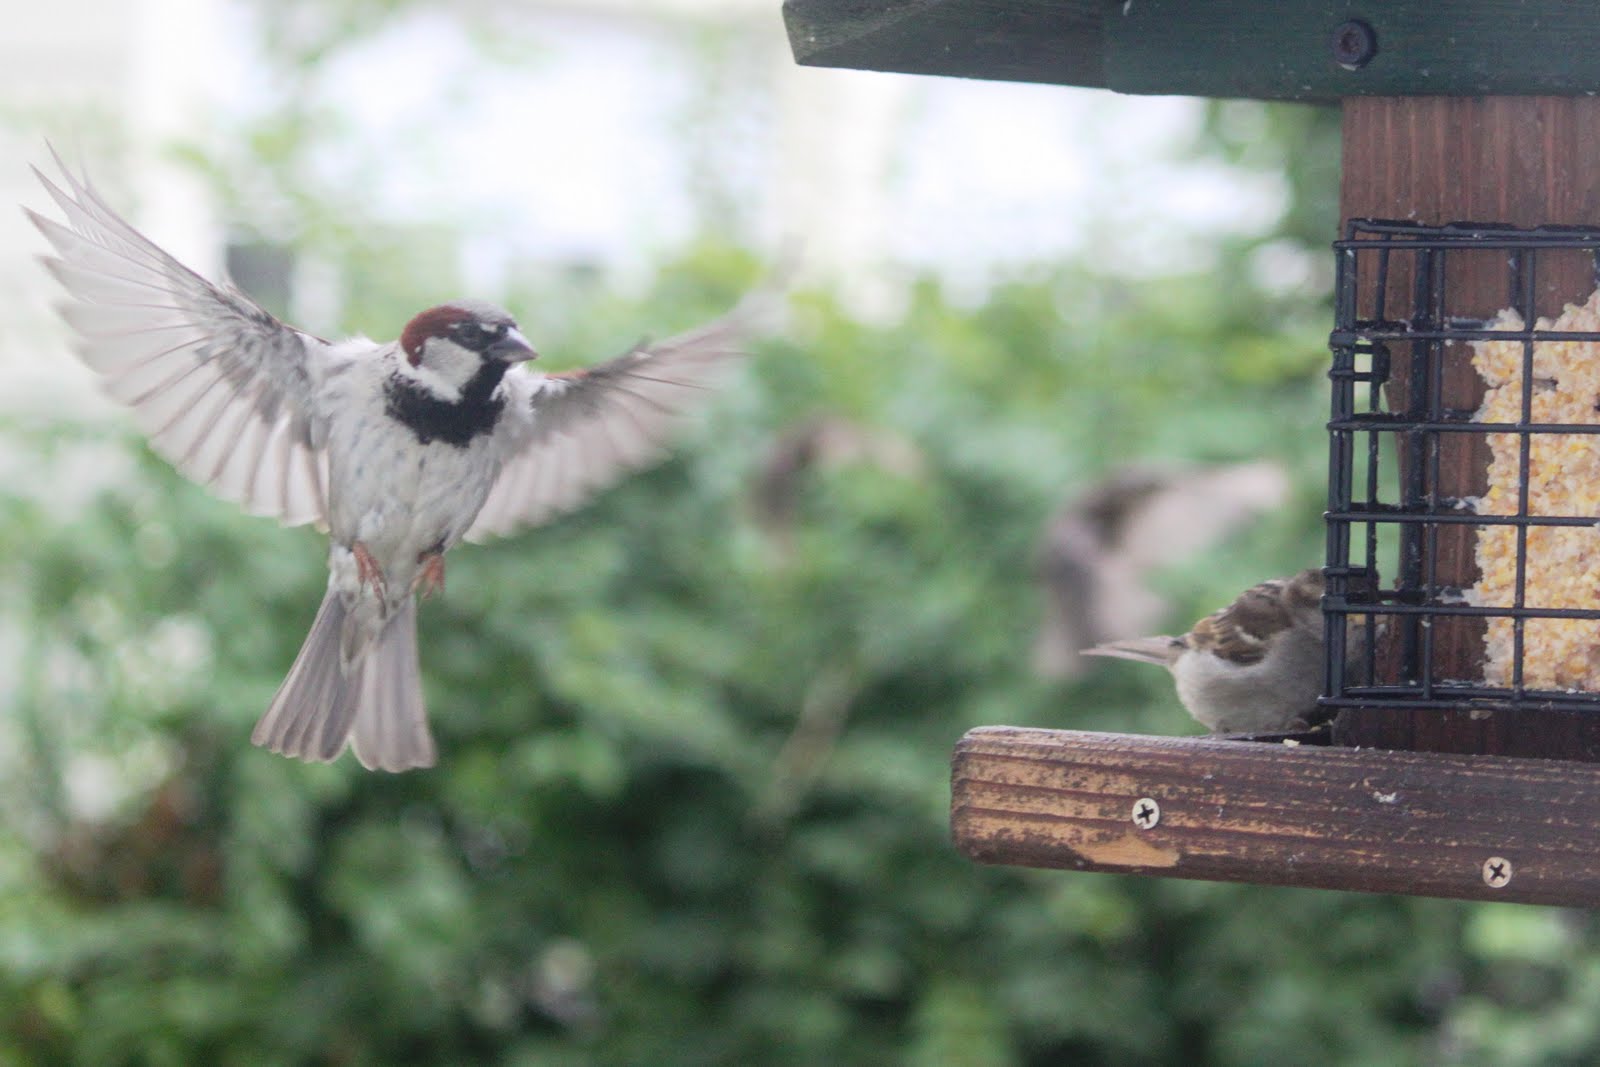
Chris and I are amateur birdwatchers, and we have quite the bird feeder set-up in the back yard, right outside the dining room windows. Yesterday I noticed that we had an unusually high amount of bird activity, and in the space of a few minutes I snapped these photos. Enjoy!

House sparrow in flight.


Blue Jay and House Sparrow in flight (next to the really long, new tube feeder Chris just brought home.)


Blue Jay.


Blue Jay and juvenile Starling.


Common Pigeon.


Pesky Squirrel. OK, I know he is not feathered, but I had to include him. Look at his hind feet!


More Blue Jay. I can't say that I really like Jays, because they seem to be really bossy and eat a ton of our birdseed, but you have to admit that that they are beautiful!


Grackle.


More House Sparrows. I really liked the composition of this photo.


Juvenile Starling. Look at the speckled feathers on his breast. I also shot some photos of a juvenile female cardinal, but they were blurry.


Common Pigeon.


I believe that this is a female Downy Woodpecker.


I have said it before, but again I am astonished at the number and variety of birds we get to see here in our neighborhood!